Introduction
The Classification Manager role lets users create multi-level libraries and classify data according to properties.
The role enables :
- Reuse existing components: You can easily reuse parts or assemblies that have already been created and validated.
- Advanced multi-criteria search for quick access to components meeting specific requirements
- Data sharing with different departments (design, quality, production, marketing, etc.)
{% video_player “embed_player” overrideable=False, type=’hsvideo2′, hide_playlist=True, viral_sharing=False, embed_button=False, autoplay=False, hidden_controls=False, loop=False, muted=False, full_width=False, width=’688′, height=’387′, player_id=’181801887341′, style=” %}
Step 1: Define theclassification library
Before you start classifying files, you need to create a library structure where the files will be stored and organized.
- Access the “IP Classification Editor” application (Classification Manager role) from the 3DEXPERIENCE platform.
- In the “Library” tab, create the general libraries that will be the first-level containers: Right-click > “New definition library “.
For example, it might be “Mechanical parts”, “Electrical parts”, or “Electrical parts”.
3. In each library, create classes, which are structures that group together components with the same properties. To do this, right-click > “New class”.
For example, we could create a screw class and a subclass “hex head screw”.
You can create as many libraries, classes and subclasses as you like.

Step 2: Creating and managing properties
Once the library has been created, you need to add properties to each class.
Properties are called “attributes” in 3DEXPERIENCE.
- In “IP Classification Editor”, access the “Classification attributes” tab.
- To create an attribute, click on“+ > Select type (String, Boolean, Real…)”.
- In the window that appears :
- Choose a name
- A predicate that must be different for each attribute.
A predicate is a unique denomination applied to data to filter or search. - Select “Yes” to filter your components with this attribute in the 3DEXPERIENCE search bar(6WTags).
- Specify values for this attribute. Separate attributes with “;”, e.g. “copper;steel;aluminum”.
- Select a default value if available or uncheck “Has default value”.
- Assign attributes to classes and subclasses. Attributes are hereditary: if you associate an attribute with a class, it will automatically be associated with its subclasses.
To do this, select a class in the tree > “Class attributes” tab> ” “
“
Step 3: Share your library
Once created in the “IP Classification Editor” application, you need to share your library with your colleagues, so that they can view it in the “IP Classify & Reuse” application.
Note: The Classification Manager role is required to create library structure, attributes and insert files.
However, once shared, other users will be able to view the library and search for components with the platform’s basic roles.
A library has a life cycle:
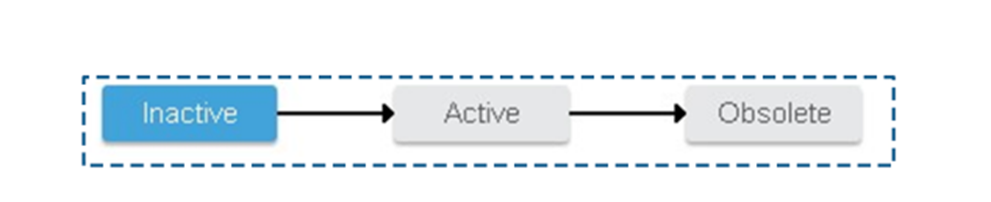
- Inactive: Default state. The library is not accessible to other users.
- Active: The library is visible to all users
- Obsolete: No longer available to other users.
In the “IP Classification Editor” application, to modify the maturity status of a library, of a class or sub-class,
Click right > Maturity
Note: Before changing the maturity of an object, it is essential to set all the libraries and classes that include it to the same maturity level.
Step 4: Inserting existing components into the library
In the “IP Classify & Reuse” application:
- Select the class or subclass in which you want to insert a file
- Drag and drop content into library body
Step 5: Reuse and search library content
One of the main advantages of the “Classification Manager” role is the ability to reuse existing designs.
In the “IP Classify&Reuse” application:
- You can perform an advanced search by clicking on “
 “
“
You can select attributes and associated constraints.
- You can find the “IP Classify&Reuse” application directly in Catia or SolidWorks, from the compass, in the 3DEXPERIENCE window.
- You can access all the information on a component, perform an advanced search and drag-and-drop parts to your CAD interface.

Conclusion
The Classification Manager role is a powerful asset for organizing, retrieving and reusing your files in a 3DEXPERIENCE collaborative environment.
You’ll optimize your design processes, reduce errors, and save precious time by avoiding the creation of duplicate files.
Note: The “Classification Manager” role is an ENOVIA role available on 3DEXPERIENCE which has an additional cost, please refer to your dedicated engineer for details.