There are several ways to activate automatic conversions. The first step is to set the conversion rules. Please note that this converts parts and drawings, but not assemblies.
Setting conversion rules
Start by visiting the 3DEXPERIENCE platform.
Go to“Platform Management“,“Content“,“Collaborative Spaces Configuration Center“, then“Management of derived formats“.
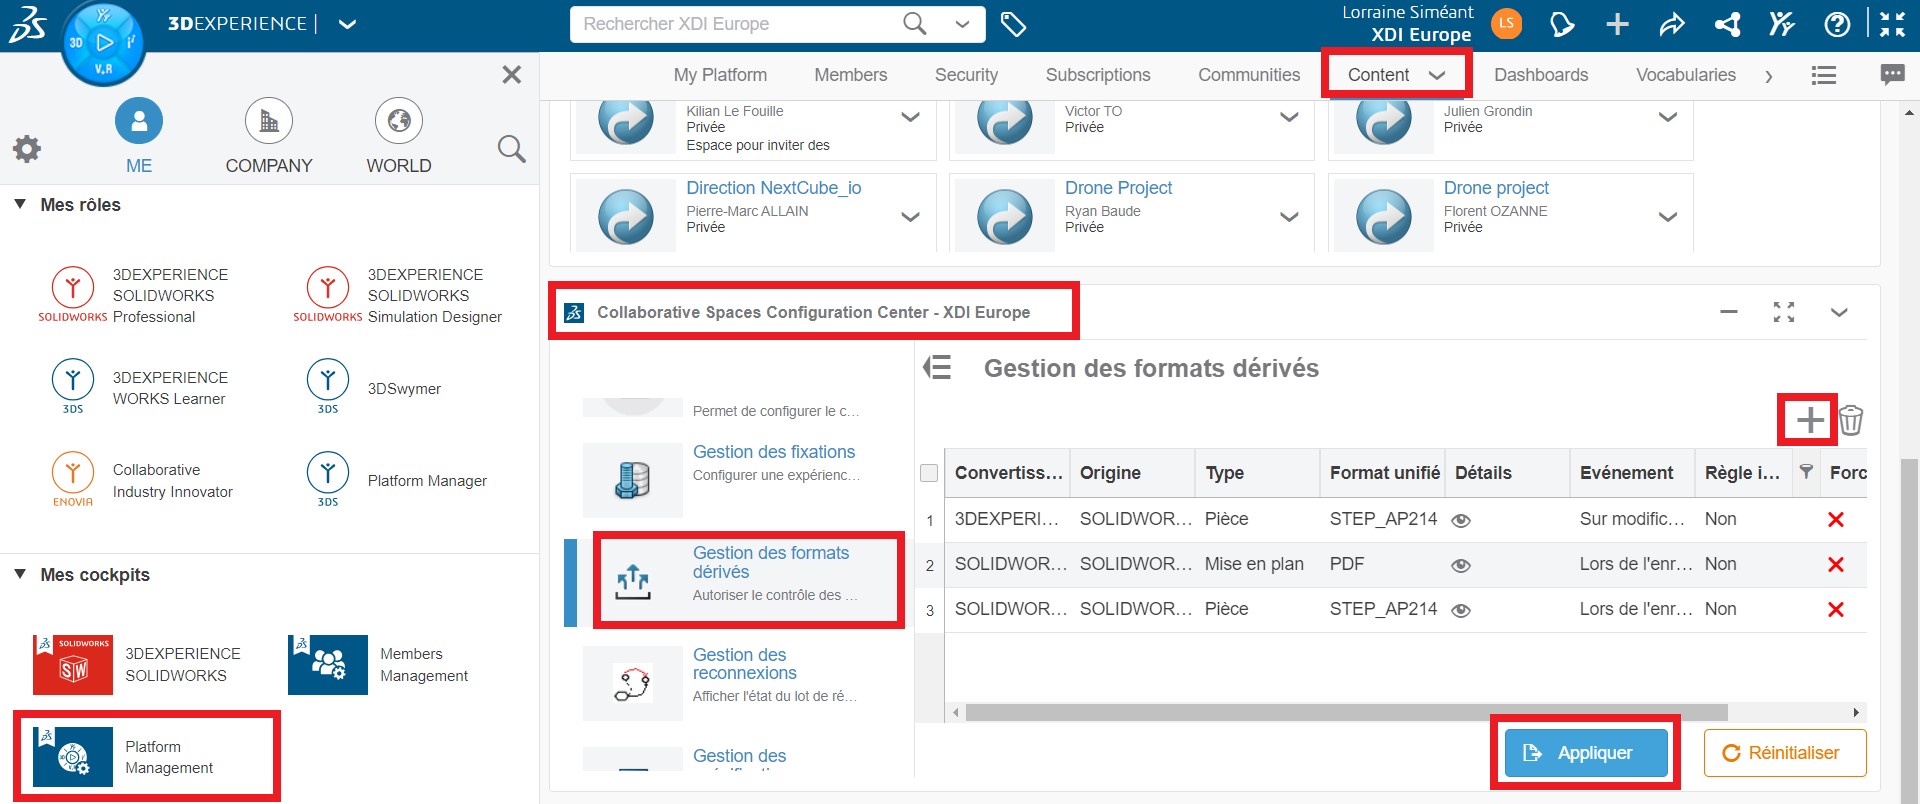
You’ll find all the conversion rules here.
Click on“+” to add a rule. A dialog box appears.
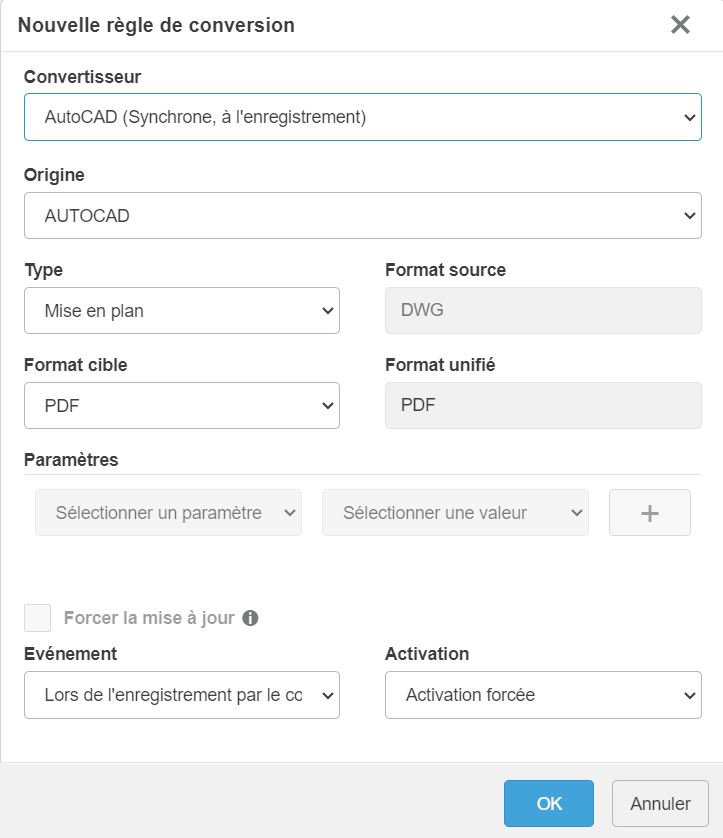
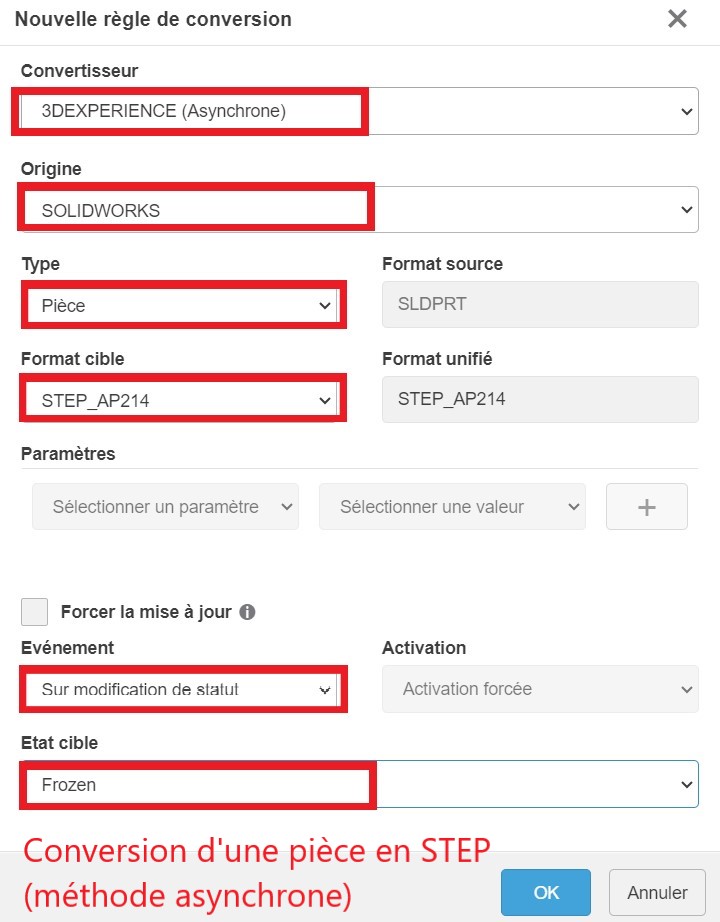
Various parameters are available:
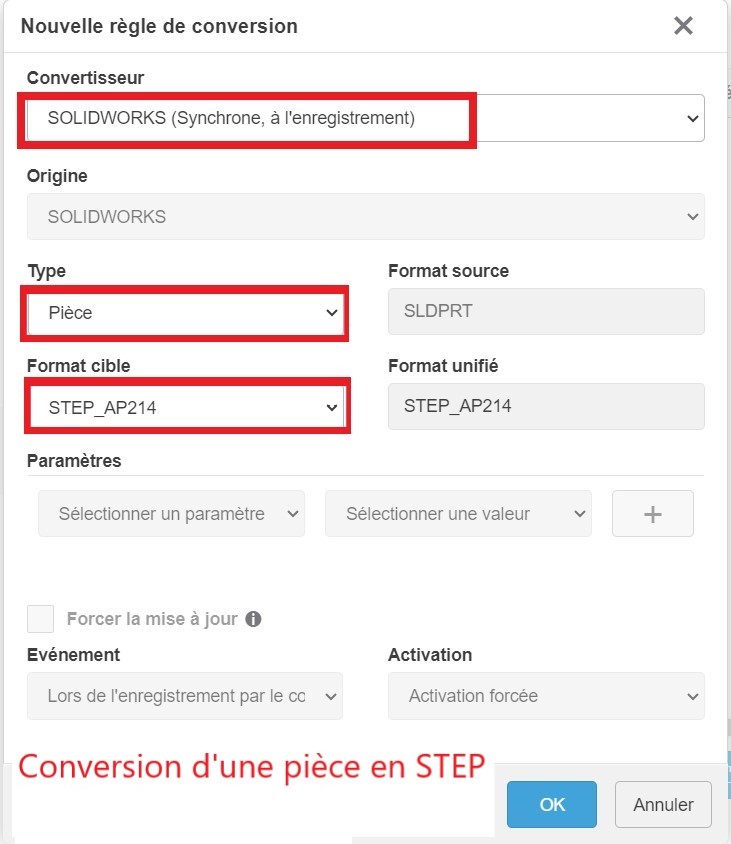
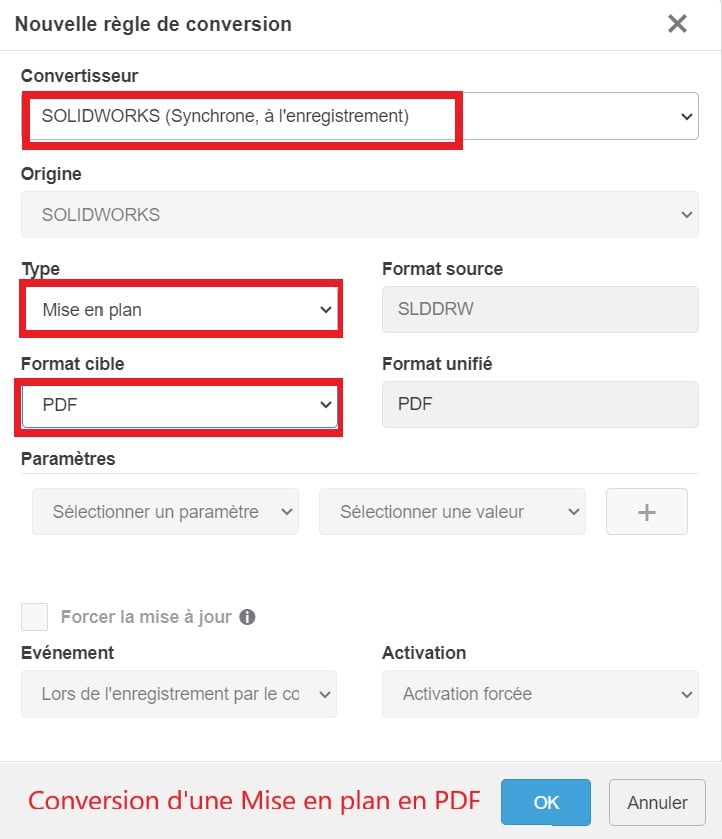
- “Converter” is the system you choose to convert your files. You can choose to have the conversion take effect when the file is saved, or when the file’s maturity is changed.
- “Origin” corresponds to the source of the file you wish to convert.
- “Type“is the type of file to be converted. As a reminder, the choice is limited to a part or a drawing.
- “Target format” is the format you wish to obtain after conversion.
- “Event” indicates the conversion method (during registration, for example).
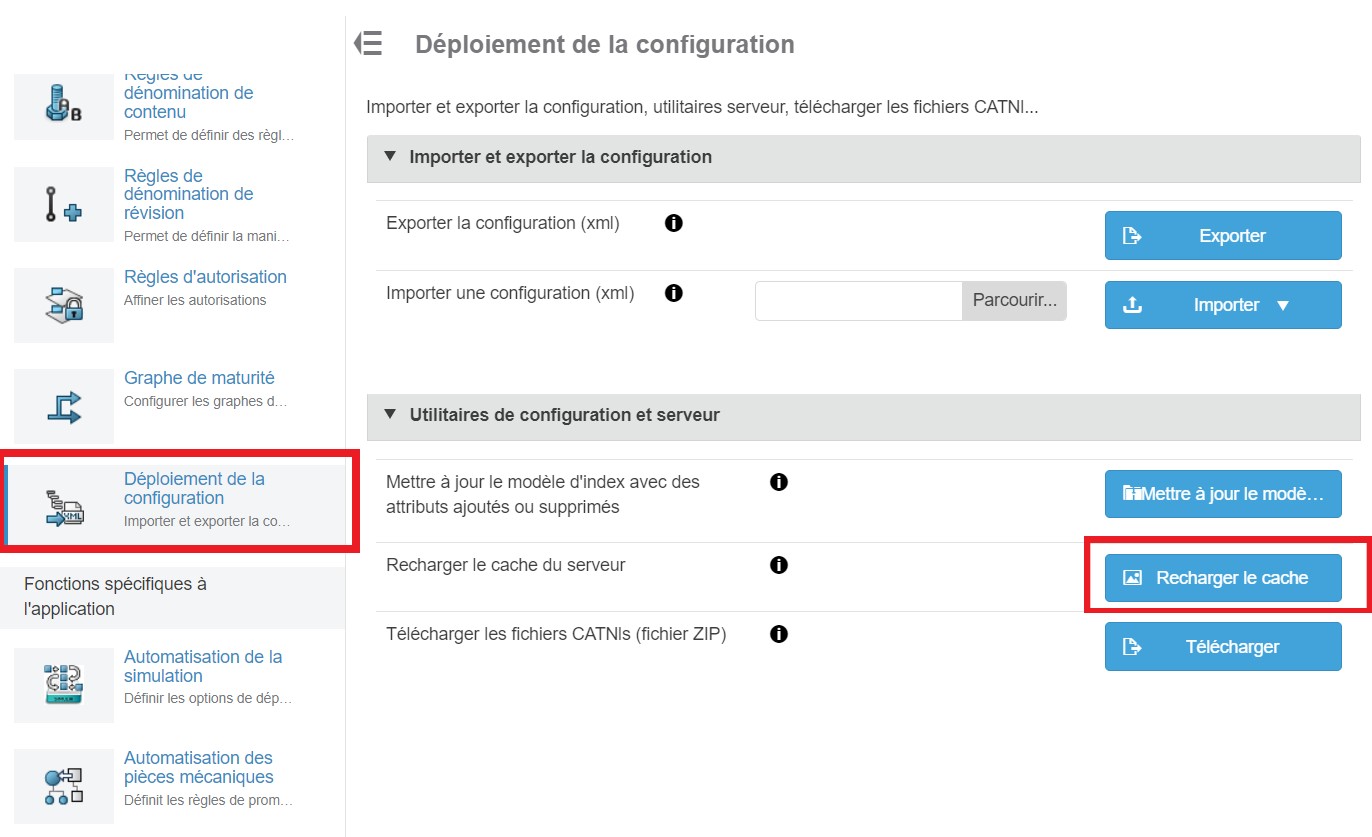
Once the rules have been added, click on“Apply“, and refresh the cache. To do this, go to“Deploy configuration“, then“Reload cache“.
Once you’ve saved the rule, you’ll need to delete it if you want to modify it!

Generate and retrieve file conversions
The choice of converter type will imply different methods for generating the converted files. Let’s take a look at some examples to see how this works.
The following conversion rules have been created for this purpose:
- A 3D file in STEP
- A PDF drawing file
First method: conversion to registration
Advantage: no additional installation required
Disadvantage: can take a very long time to save configured files (screws, nuts, etc.).
These two rules will trigger the conversion of files when they are saved in SOLIDWORKS.
Note: SOLIDWORKS must be restarted for the rule to apply during registration.
Open SolidWorks, then load the part or drawing of your choice. Make a modification, or simply CTRL+Q (global refresh).
Make your backup with 3DEXPERIENCE (see tutorial).
The converted files are generated and saved in your Bookmarks (see tutorial), in the location where the modified part is saved. To find them, select your part, then go to Information “i”. Then select the“Derived output” icon (three outgoing arrows).
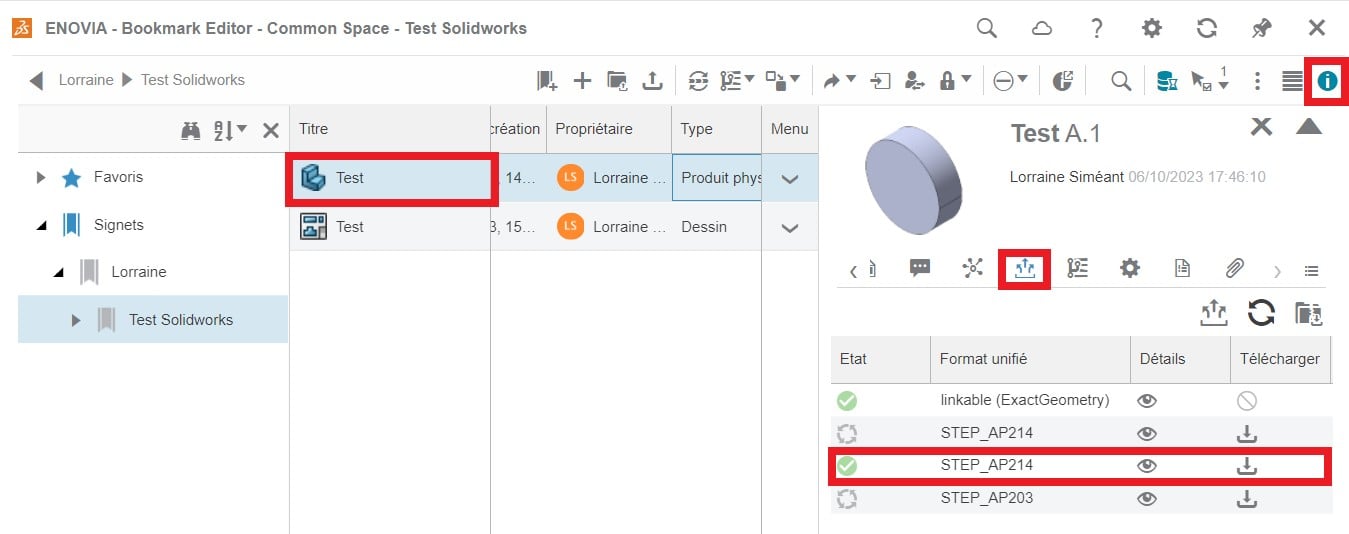
Now all you have to do is download your converted file!
If you want to download several files, it can be tedious to download them one by one… What if we told you that you could retrieve all the files in an assembly at once ?
Still in Bookmarks, select your assembly. Unsurprisingly, in“Derived releases“, it’s a blank!
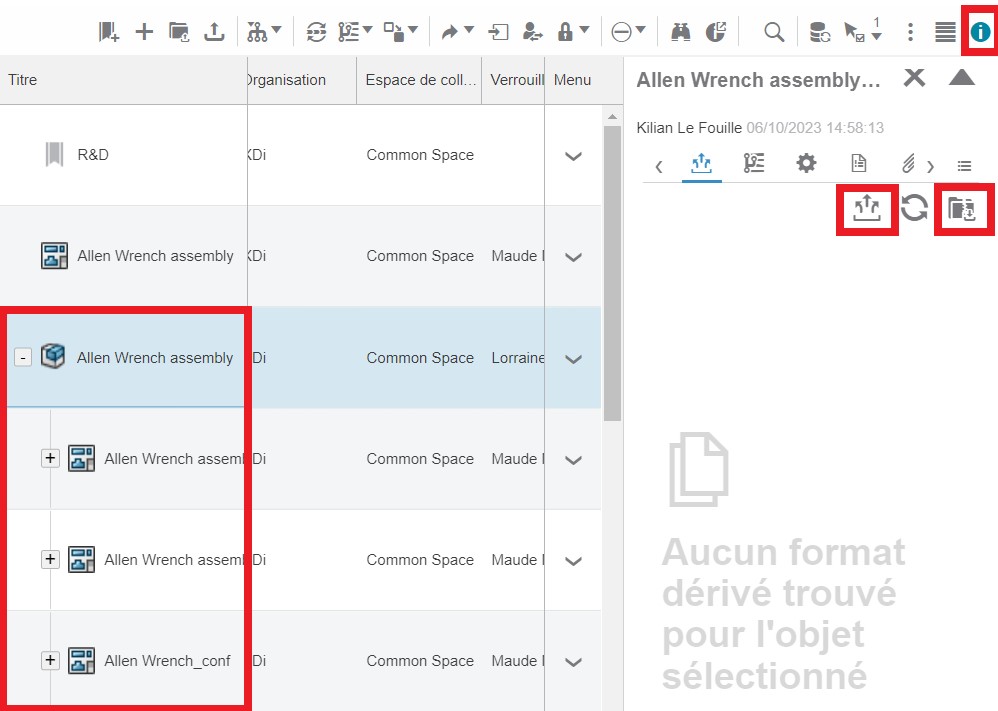
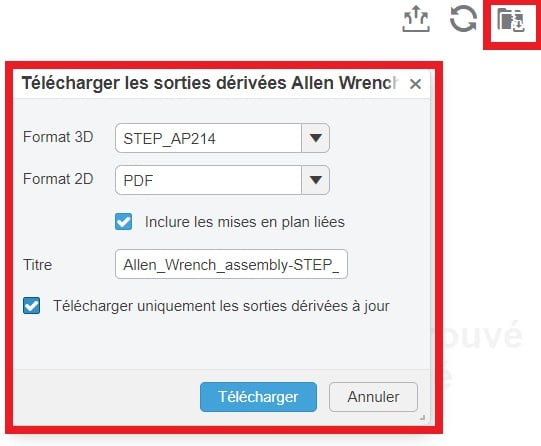
On the other hand, you’ll notice an icon with a folder next to“Derived outputs“. This“Download all derived outputs” icon contains, as its name suggests, all your converted files. Just click on it and download!
Now you know how to generate conversions automatically, thanks to SOLIDWORKS registration.
We’ll now look at how to generate these conversions by simply modifying the maturity status of a file.
Second method: conversion at change of maturity
Advantage: files are converted when they are “distributed” (=validated).
Disadvantage: need to install and maintain an additional application
This rule will start the conversion of files when they change maturity in 3DEXPERIENCE.
This choice of converter is important here, as it involvesinstalling a 3DEXPERIENCEapplication to handle the conversions.
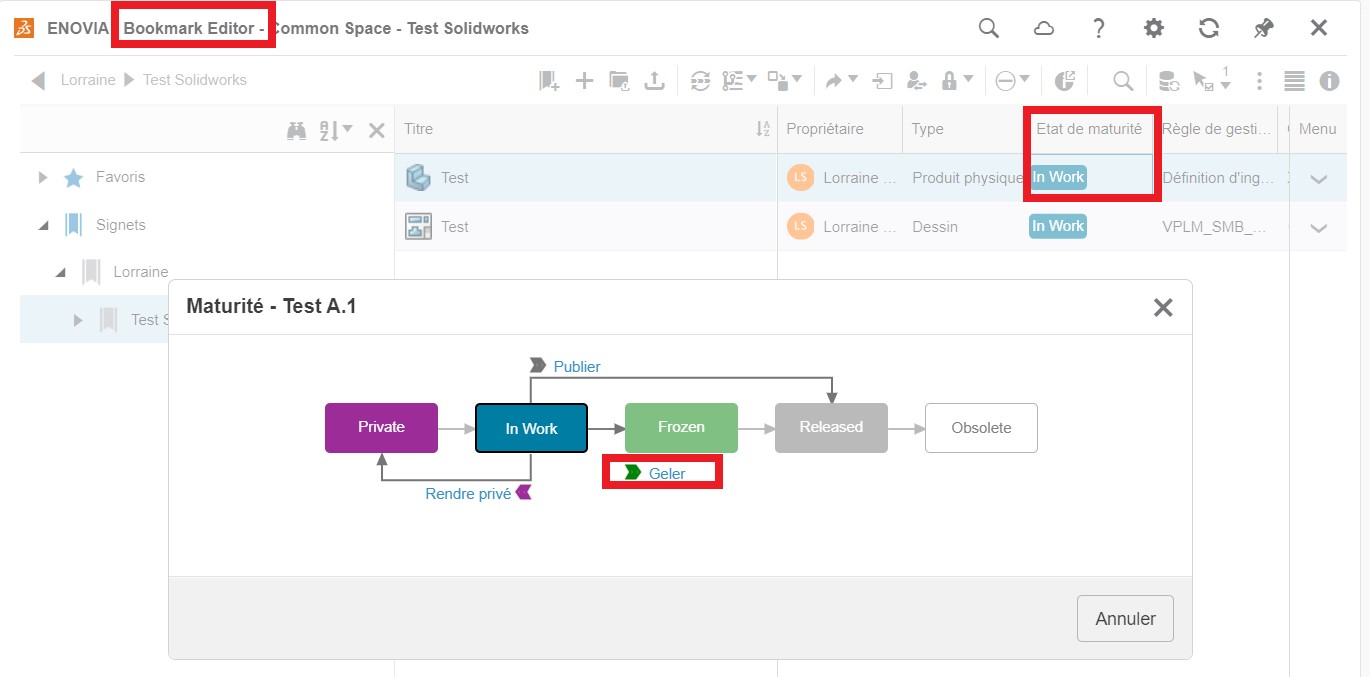
The status change for this example is set to“Frozen“. In other words, the file conversion will run when you change its status to“Frozen” in 3DEXPERIENCE.
Be sure to check “Force update” to keep your PDF / STEP files up to date.
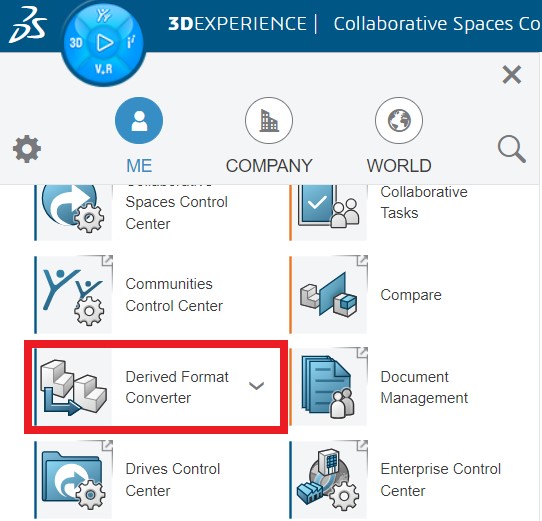
Let’s see how to install the conversion application.
In 3DEXPERIENCE, click on“Derived Format Converter“. The application will install.
Once installed, simply go to Bookmarks, select the file to convert and change its status. As the rule has set the status to“Frozen” for generating conversions, you now need to select this maturity.
The files will be stored in“Derived outputs” as shown above.

Conclusion
Now you know how to convert your files automatically. Three rules have been presented as examples, but you’re free to create the ones that suit you best!