1. Why customize your interface?
Customize your interface for greater efficiency:
– By reducing visual distractions and highlighting the most important elements in your workflow
– Minimize SolidWorks loading time by hiding what you don’t use
– And simply to become a good SolidWorks citizen and enjoy working with the software even more!
2. Interface presentation
Interface presentation
The SolidWorks interface is fully customizable. It is composed of different parts:
– Purple: the task manager, visible only when a file is open
– In red: the creation tree, showing the history of the design or assembly of our file.
– In green: the shortcut bar (accessible by pressing the S key on the keyboard)
– In blue: Quick-access tools
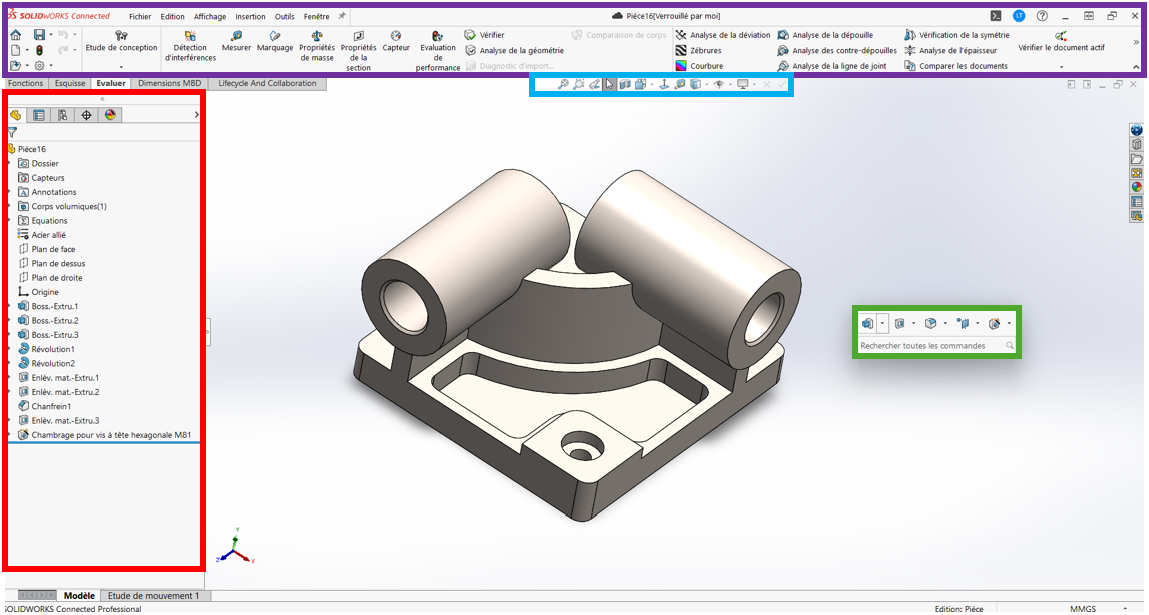
Note: We recommend pinning the Task Manager and the “File-Edit-Display” menu that appears when you move the mouse over “SolidWorks Connected”.
2. Visual cleaning
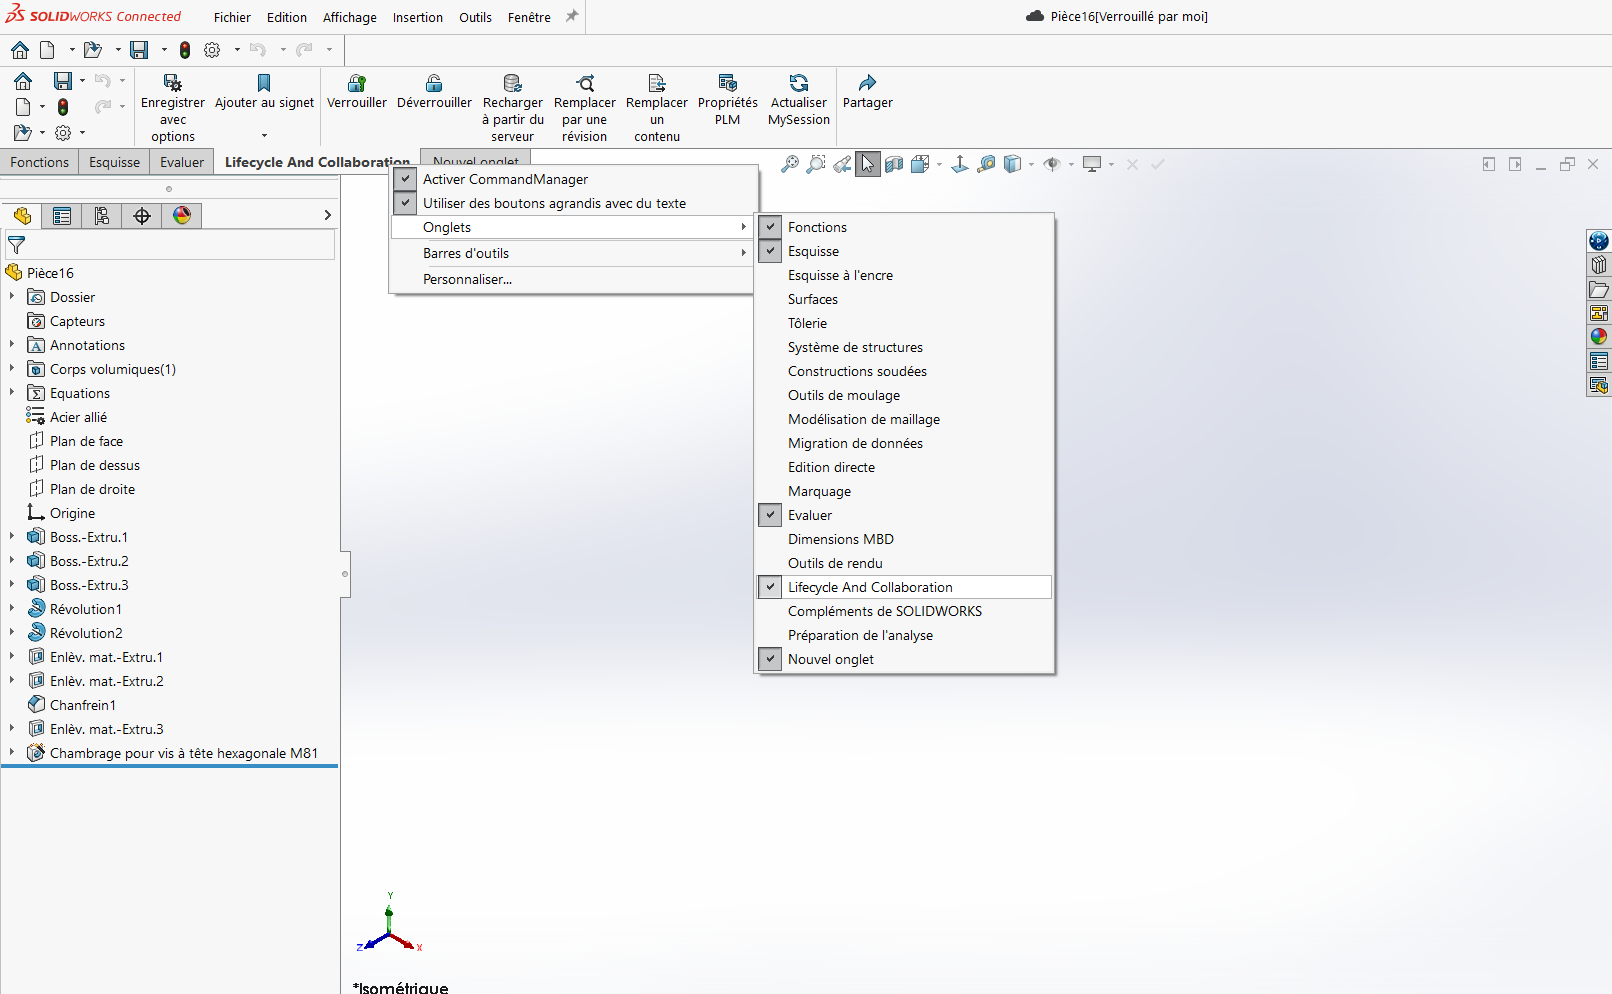
Before customizing your menus, it’s time to clean up your SolidWorks interface.
1. Right-click on the taskbar > Customize :
2. In the “Toolbar” tab, uncheck all menus you don’t use
3. Keeping the“customize” window open, you can delete any unused icon by dragging it out of its toolbar.
4. You can disable tabs you don’t use by right-clicking > tab > deselect
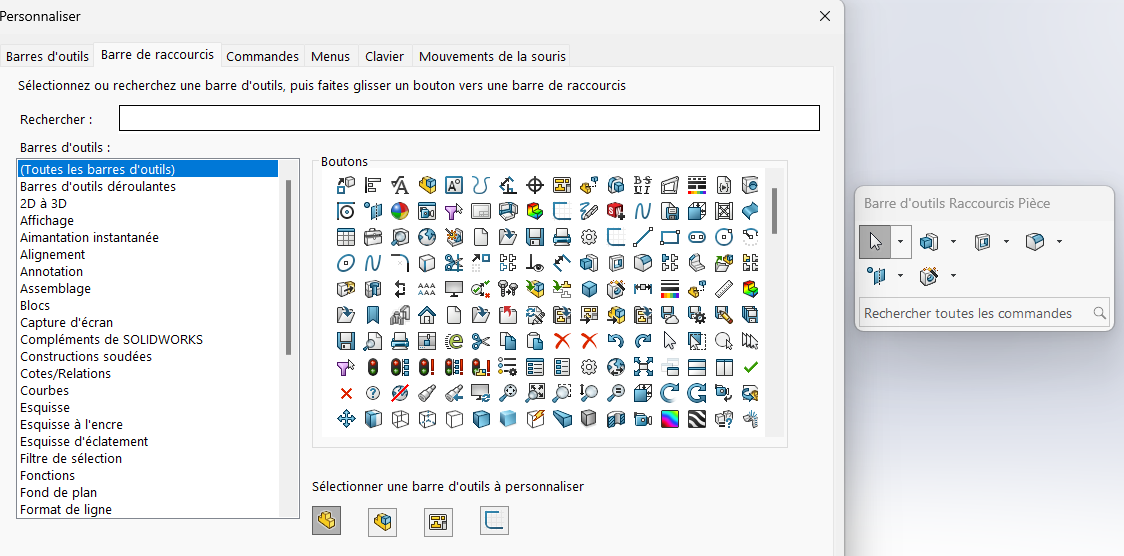
3. Customize command bars
Select the toolbar to be customized :
1. In the customization window, click on the “Toolbars” tab.
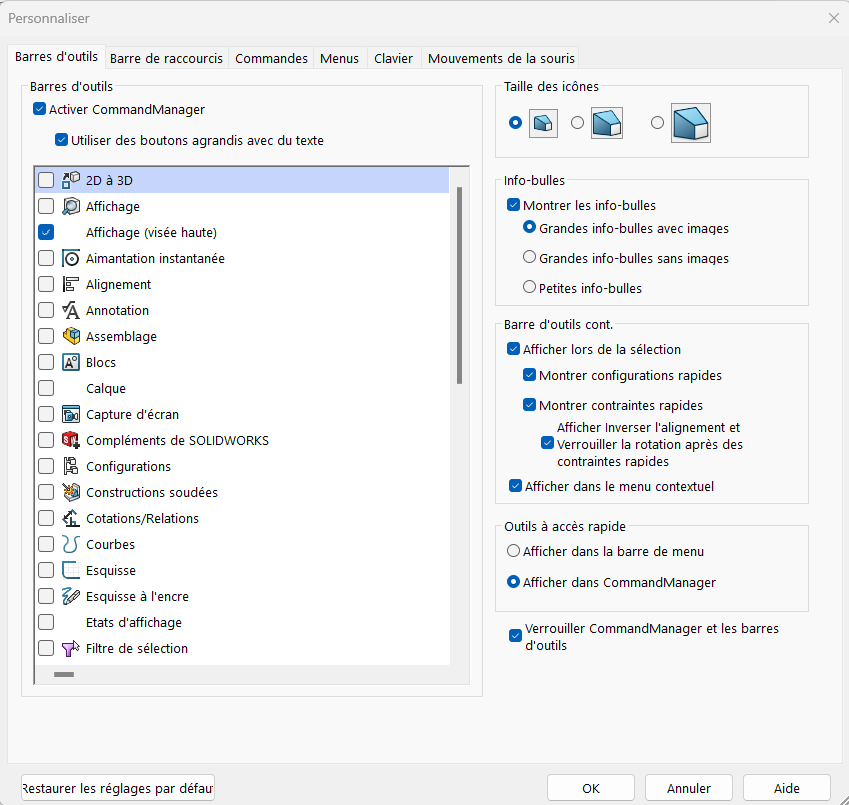
2. Select the toolbars that correspond to your daily use (e.g. sheet metal work, assembly, etc.).
We recommend that you keep the“View Up” bar for quick access to your favorite commands.
3. Adding or removing buttons : Once you’ve selected a command bar, you can add or remove buttons by dragging icons from the “commands” tab available in the “toolbar” tab to the command bar, or by dragging existing buttons to rearrange them.
4. Customize button options: Some buttons may have additional customization options. Right-click on a button to see if there are additional options you can adjust.
5. You can customize the shortcut bar (accessible via the S key on the keyboard) in the “Shortcut bar” tab. There are 4 shortcut bars for each file type: part, assembly, drawing and sketch. You can choose the type of bar to customize and add/remove commands.
If you wish to have a larger display screen on SOLIDWORKS, click on the taskbar > Customize,
you can change the size of icons and remove associated text by unchecking“Use enlarged buttons with text“.
4. Customize menus
In the Customization window, click on the “Menus” tab. This will display a list of menus available in SolidWorks.
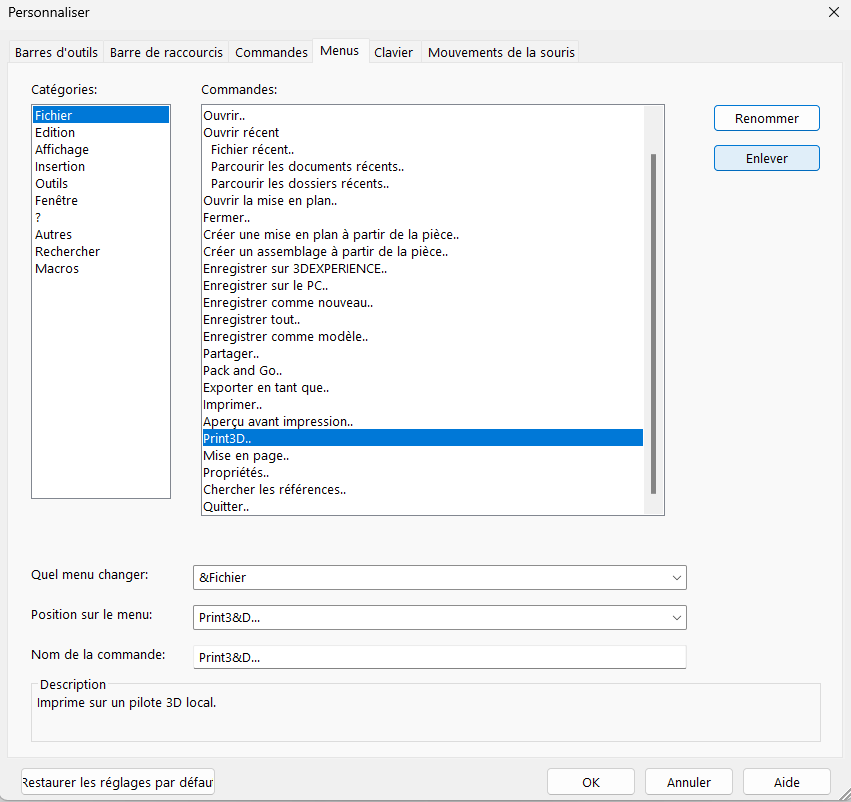
1. Select the menu to be customized from the list. For example, you can select the “File”, “Edit”, “View” menu, etc.
2. Edit menu: Once you’ve selected the menu you want to customize, you can add new commands, delete existing ones or rearrange commands to suit your needs:
– To add an order, click on “Add”.
– To delete an order, click on “Remove”.
– To reorganize commands, in “Menu position”, you can view the order of commands and change their position in the tree.
3. Save changes
5. Customize design tree display
You can change the default parameters displayed in the design tree.
To do this:
1. Click on : Tools > FeatureManager > Show/Hide tree objects

2. Modify the desired parameters
3. Click “OK”.
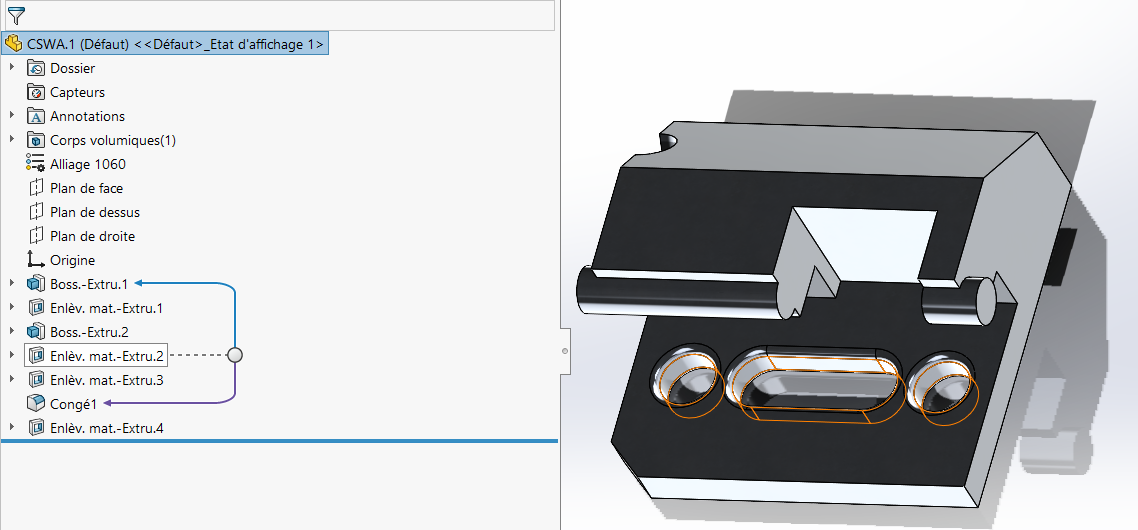
A second very useful tip is the display of parent/child relationships in the design tree.
To display them :
1. click on your room title at the top of the tree
2. Select“View dynamic references“.
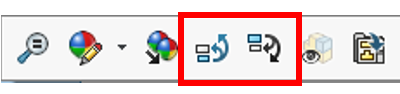
3. Move your mouse over a function to view its relationships
You can also add comments under each tree function
right-click > Comment > Add a comment
Comments are date-stamped, enabling you to point out any doubts about quotations to your colleagues, for example, or to keep a record of modifications.
6. Customize mouse movement options
You can also customize mouse movements:
With a document open, go to Tools > Customize > Mouse movements > Enable mouse movements
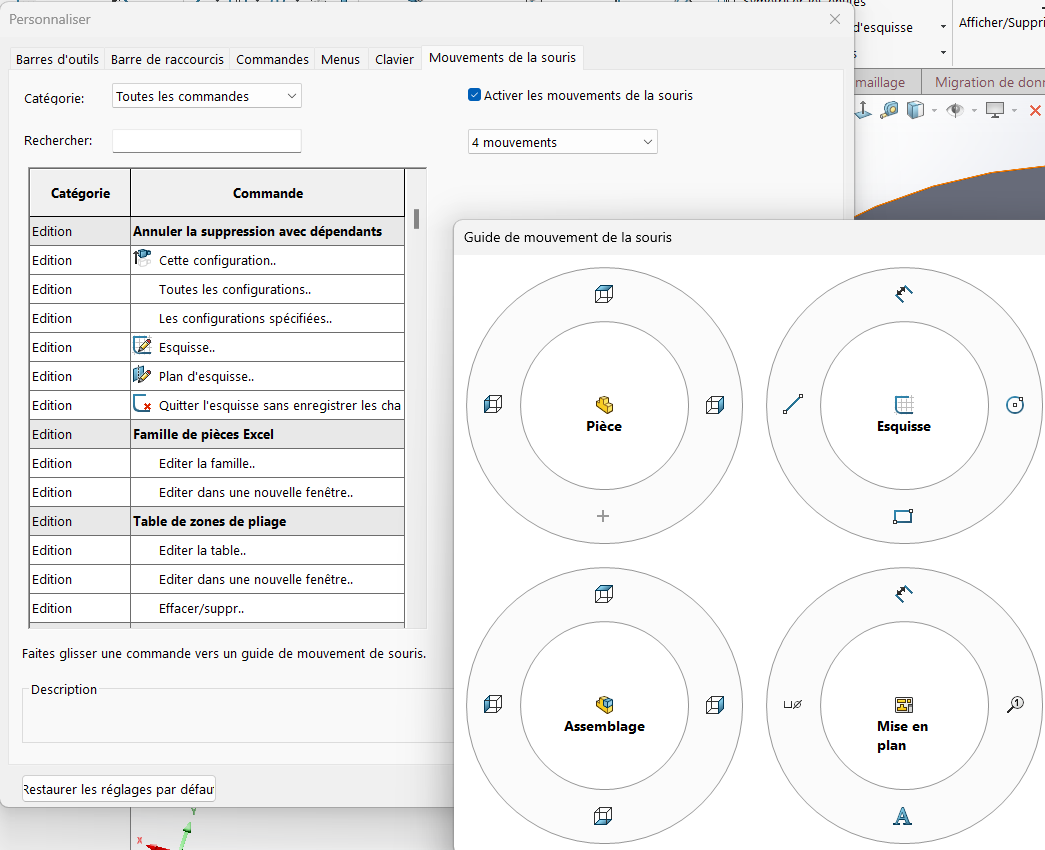
You can select the number of movements you wish, but we recommend 4 or 8.
In the graphics area, right-click and drag in the direction of movement corresponding to the tool or macro.
The mouse movement guide appears, highlighting the tool icon or macro corresponding to the direction of movement.
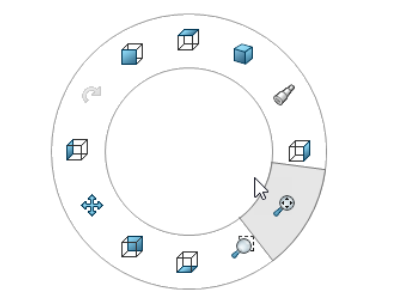
For example, with a room open, drag with the right mouse button to the bottom right corner, towards the highlighted tool.
7. Keyboard shortcuts
Some useful keyboard shortcuts :
| S | Toolbar |
|
Alt + the first letter of a tab (e.g. Alt+F for file) |
Display and select |
|
Ctrl+tab |
Navigate between open files |
|
F or double click wheel |
Close-up zoom |
|
Z / Shift+Z |
Zoom +/- |
|
Space |
View manager |
|
Ctrl+Number from 1 to 8 |
Predefined views |
|
G |
Magnifying glass |
|
Shift/Alt/Ctrl + Keyboard arrows |
Part rotation |
You can view and create your own keyboard shortcuts based on your own workflow:
Right-click on toolbar > Customize > Keyboard shortcuts
Examples if you’re short of inspiration:
Alt+T to display temporary axes
Alt+C for construction line
Alt+L for sketch line
Conclusion
Now you have all the tools you need to optimize your user interface and share it with all your colleagues!
Not satisfied with your interface and want to start from scratch? Don’t panic, you can reset the menus to their default values:
Right-click on the taskbar > Customize > click on Reset to default values
On the contrary, you’re very proud of your new, ultra-functional interface? Do you want to keep it in a safe place and give it to all your colleagues?
Tools > options > Backup/Recovery -> Backup and choose a file location

Want to find out more?
Watch our webinar hosted by Maud Pallaro on XDI Community!
Need help? We’d love to! Send us an e-mail to support@xdinnovation.eu