In this article, you’ll learn how to use the“Verified by” and“Verified on” properties and display them on your drawings. They will enable you to track your validation process automatically!
Here’s an overview of what you can achieve by following this tutorial.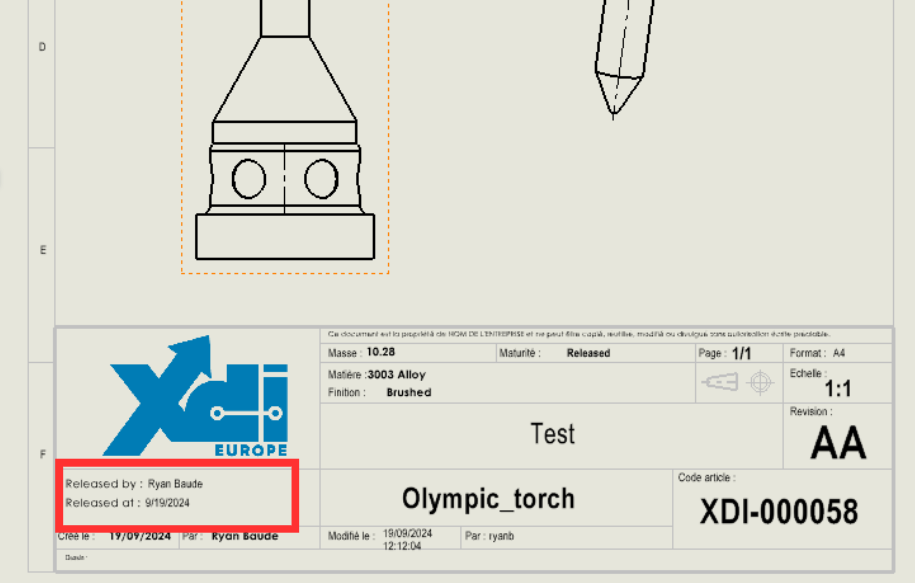
Step 1: Create a room.
Create any geometry in SOLIDWORKS and save it.
Step 2: Create a drawing.
You can create one from this part by clicking on New > Create drawing from part.

Step 3: Create your drawing properties.
Go to your drawing’s custom properties via File > Properties![]() > Custom.
> Custom.
Create properties named“Verified by” and“Verified on”(or any other relevant name).
In the Value/text expression field, from the drop-down menu, select respectively: “Approved [1] (ea_releasedby.1)” and “Approved on [1] (ea_releaseddate.1)”.

Step 4: Modify the sheet format.
Right-click on“Sheet 1“, choose“Edit background” and create your title block.

For more details on modifying the drawing background, see this tutorial.
Step 5: Add your properties to your cartridge.
First, add an annotation by clicking on“Note![]() ” and insert it in your title block.
” and insert it in your title block.

In the Text format menu, click on the“Link to a property![]() ” icon. Select“Current document“.
” icon. Select“Current document“.
In the Property name drop-down menu, choose the property you’ve created (for example, “Verified by”).
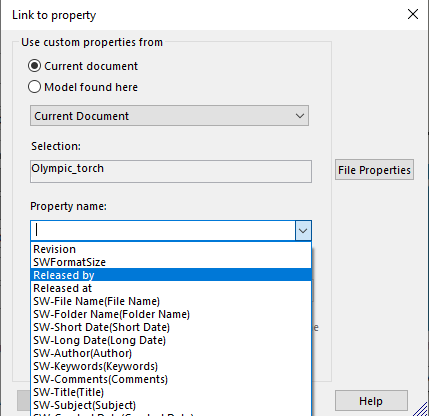
The value displayed is visible in“Evaluated value”. Click on OK.
Your property is now successfully displayed on your drawing.

We recommend that you create a template containing this property field, so that it is automatically filled in for each drawing.
See our dedicated article for more information: Creating and sharing templates.
For 3DEXPERIENCE users :
Once your layout has been validated, you’ll need to save it again so that the fields are visible on the platform.
Here’s how to save a validated drawing without creating a new revision:
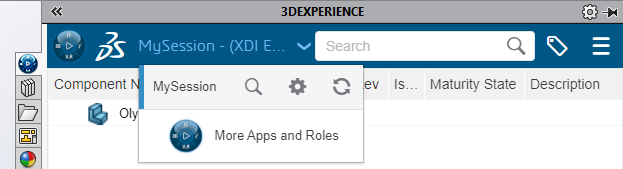
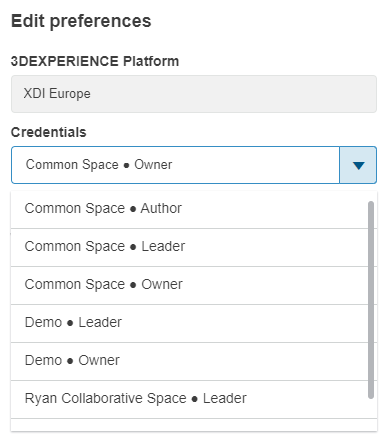
Step 1: In SOLIDWORKS, open the MySession tab, click on the drop-down menu and select Settings.
Step 2: Then click on“Login details” and choose“Owner” for the corresponding collaborative space (in most cases, this is “Common Space”).
You can now save the validated file. Don’t forget to reset your credentials after saving.
Need help?
We’d love to help! Send us an e-mail to support@xdinnovation.eu.