Context: Scenario
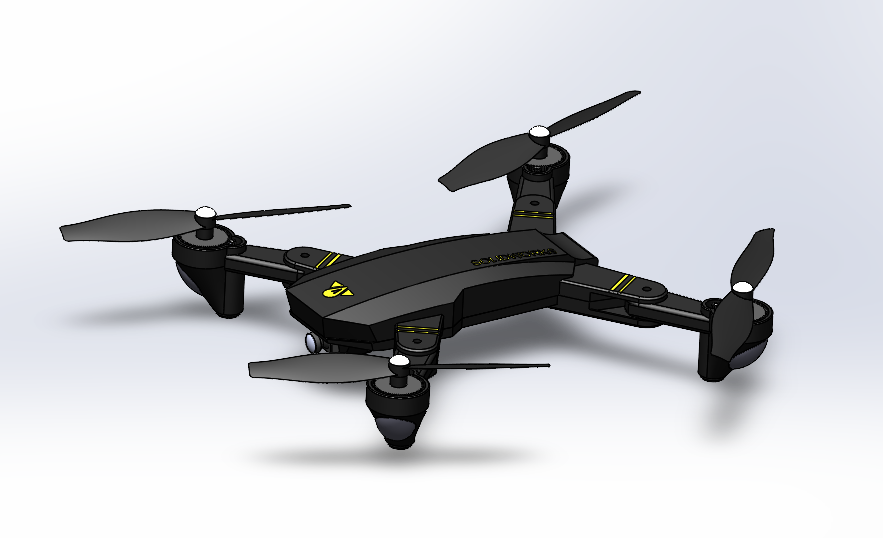
Let’s imagine you work for a company that manufactures drones. During a test cycle of your new drone model, a problem is identified: the motors heat up abnormally after 20 minutes of flight.
We’ll use this scenario to illustrate how to deal with this problem and implement a solution using 3DEXPERIENCE tools.
Step 1: Create a problem report and notify the relevant team
Objective: Capture the identified problem and assign it to the appropriate team.
Activities :
1. Create a problem statement:
I advise you to create a tab dedicated to issue management, containing the Issue Management, Change Action and Issue 3D Review applications, as in the video below. This will simplify your navigation.
- Action: Open the Issue 3D Review application.
- Details: Record the motor overheating problem. In the “Properties” tab, write down the problem in detail, including test conditions, observed symptoms, and any relevant data.
2. Add relevant data:
-
- Action: In the “Content” and “Attachments” tabs, select the item(s) concerned and add the documentary resources that illustrate the concern.
3. Assign the problem:
-
- Action: In the “Members” tab, assign the problem to the team responsible for solving it.
Step 2: Analysis and review in 3D context
Objective: Analyze the problem using 3D visualization and prepare the modification phase.
Activities :
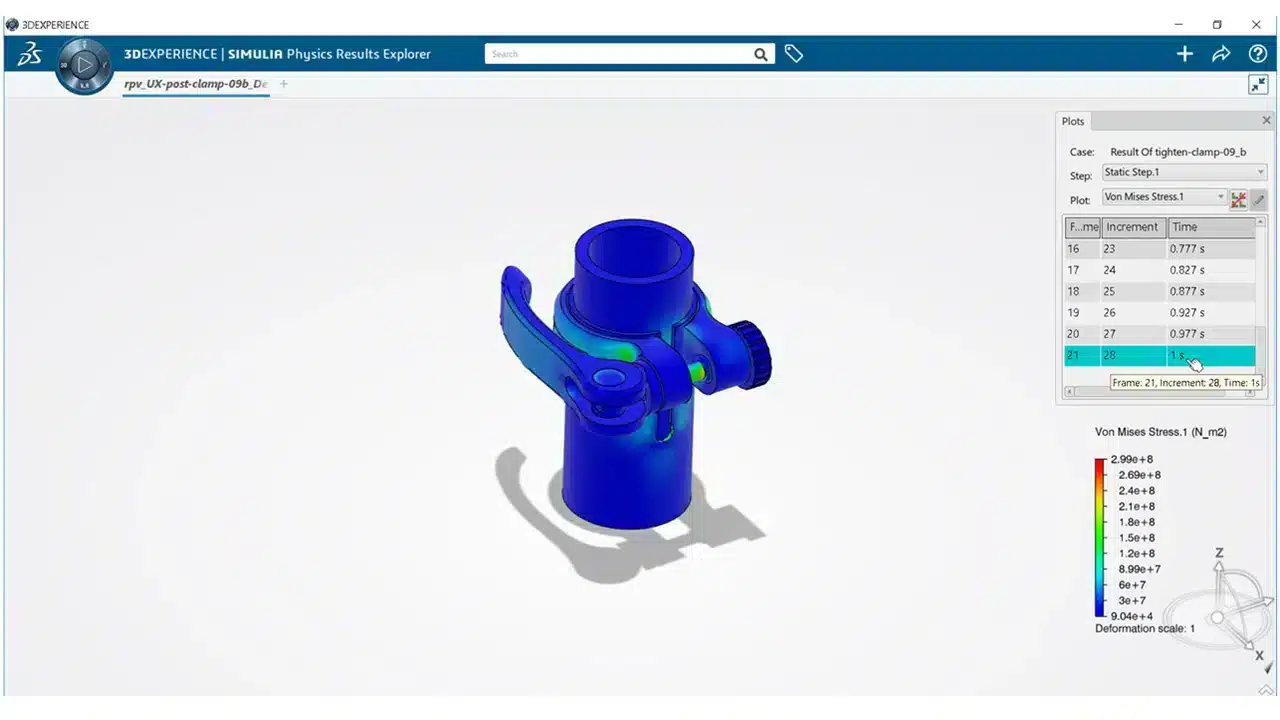
Explore the 3D model with Issue 3D Review:
- Action: Load the drone’s 3D model into Issue 3D Review.
- Details: Use the navigation tools to examine engine components and visually identify areas of overheating. Add annotations to highlight problem areas.
Step 3: Planning and validating change
Objective: Propose and validate the corrective actions needed to solve the problem.
Activities :
1. Creating a Change Action:
- Action: Open the Change Execution application and propose a modification (e.g. replacing motors or adding a cooling system).
- Details: Document the change proposal, including details such as estimated costs, timescales and potential impacts on design and production.
2. Validation route:
- Action Create a validation route to obtain approval for the change.
- Details: Define a validation sequence involving key stakeholders (such as the project manager, production team, and quality department) to review and approve the change.
👉 Need more information on validation routes? Read the article!
Stage 4: Implementing and monitoring change
Objective: Apply the approved change and monitor its implementation.
Activities :
Implementing the Change Plan:
- Action: Implement approved corrective actions.
Step 5: Final validation and problem closure
Objective: Check that the change has solved the problem and close the problem record in the system.
Activities :
1. Final validation:
-
- Action: Run tests to check that the overheating problem has been solved.
- Details: Use the same test conditions as those used to identify the problem, to ensure the success of the solution.
2. Closing the problem in Issue Management:
-
- Action: Close the issue in Issue Management after validation.
- Details: Mark the problem as solved, add comments on the actions taken and archive it for future reference.
Conclusion
This structured process helps you to identify, analyze and resolve problems, while ensuring the necessary coordination and approval of changes using Issue Management, Change Action, Issue 3D Review and Route Management tools.
👉To find out more, contact us!